Bienvenido al nuevo Bose.mx
Tiendas

Setting up your system

Set up the speaker array

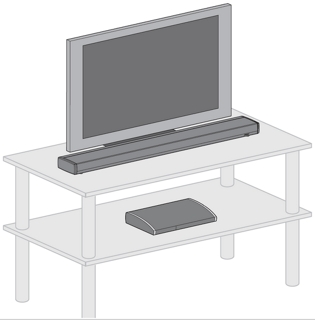
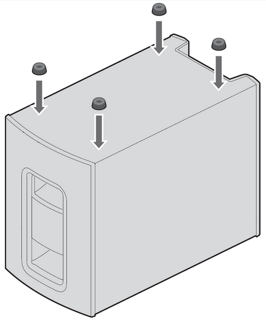
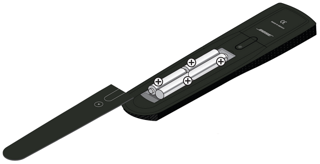
Lay the speaker array grille side down on the table in front of your TV

Note: To protect the surface of your table, you may want to put a protective cloth under the speaker array until setup is complete. Or, you can use the foam bag the speaker array came in.

Plug the audio input cable into the connector labeled "Audio In" on the speaker array. Make sure the flat surface with the arrow on the plug faces up

Plug the small end of the power cord into the connector labeled "Power"

Note: Do not plug the power cord into an AC power outlet at this time. You will be instructed to do it later in the setup process.

Arrange the cables as needed for your setup location. If you prefer, you can secure the cables under the clips in the channel running along the length of the speaker array

Note: To raise the speaker array and allow more space under it, you can install the optional extension feet (supplied).

Turn the speaker array over and place it in front of your TV with the speaker grille facing into the room

Set up the console

Place the control console on a flat, stable surface near your TV

Note: Until your system is completely installed, it may be helpful to keep the control console positioned for easy access to its rear connection panel.

Plug one end of the supplied HDMI® cable into an HDMI INPUT connector on your TV

Insert the other end of the HDMI cable into the "HDMI OUT Video to TV" jack on the control console

Plug the audio input cable coming from the speaker array into the connector labeled "Audio Out" on the control console. Make sure the flat surface with the arrow on the plug faces up

Note: Make sure the audio input cable is not plugged into a Bose® link connector.

Plug the power supply output cord into the connector labeled "Power"

Plug a power cord into the power supply

Plug the power cords from the speaker array and the control console into an AC (mains) power outlet

Set up the Acoustimass® module

The Acoustimass module connects wirelessly to the speaker array. The only wire that connects to the Acoustimass module is the power cord.

When placing the Acoustimass module on bare floors or other smooth surfaces, attach the included rubber feet to the bottom of the module for greater stability and to protect your floor

Plug the small end of the power cord into the "Power" connector

Place the Acoustimass module on its feet along the same wall as your TV, or along any other wall in the front third of the room. The front opening of the module can face any direction. Make sure there is an AC outlet nearby

Plug the Acoustimass module power cord into an AC (mains) power outlet

Set up the remote control

Slide the battery compartment cover off the back of the remote control

Install four AA (IEC LR6) batteries, matching the polarity markings (+ and –) to the markings inside the battery compartment

Slide the battery cover back into place

Turn your system on and follow the on-screen instructions

on the control console, press power to turn on your system. because the system is in a low power state when in standby, it takes several seconds to start. when the power light on the control console changes from blinking to steady green, your system is ready to use

Check that the status indicator on the speaker array is off. If the status indicator is blinking orange, there is no wireless connection between the speaker array and the Acoustimass module

Turn on your TV

Using the remote that came with your TV, change the TV input to the one that is connected to your Lifestyle® system

Follow the instructions on your TV screen. You will be prompted to do the following:

Select your language

Run the ADAPTiQ® audio calibration system

Connect and set up audio/video devices using the Unify® intelligent integration system

Configure your Bose remote to control your connected devices